Have you ever wondered if what you see in “real life” truly represents the reality of our physical universe? We’ve grown so accustomed to certain aspects of our perception that any deviation would immediately signal that something is off. Think about the glitching cat in The Matrix or imagine if your life suddenly unfolded at 30 frames per second — as if lit by a strobe light on a dance floor. How do we know we’re not already inside the world’s most immersive video?
In this post, I’ll share the tips, guidelines, and techniques I’ve gathered while working with filmmakers, studios, customers, enthusiasts, and fellow technicians during my time at the immersive video startup Pixvana.
Pixvana
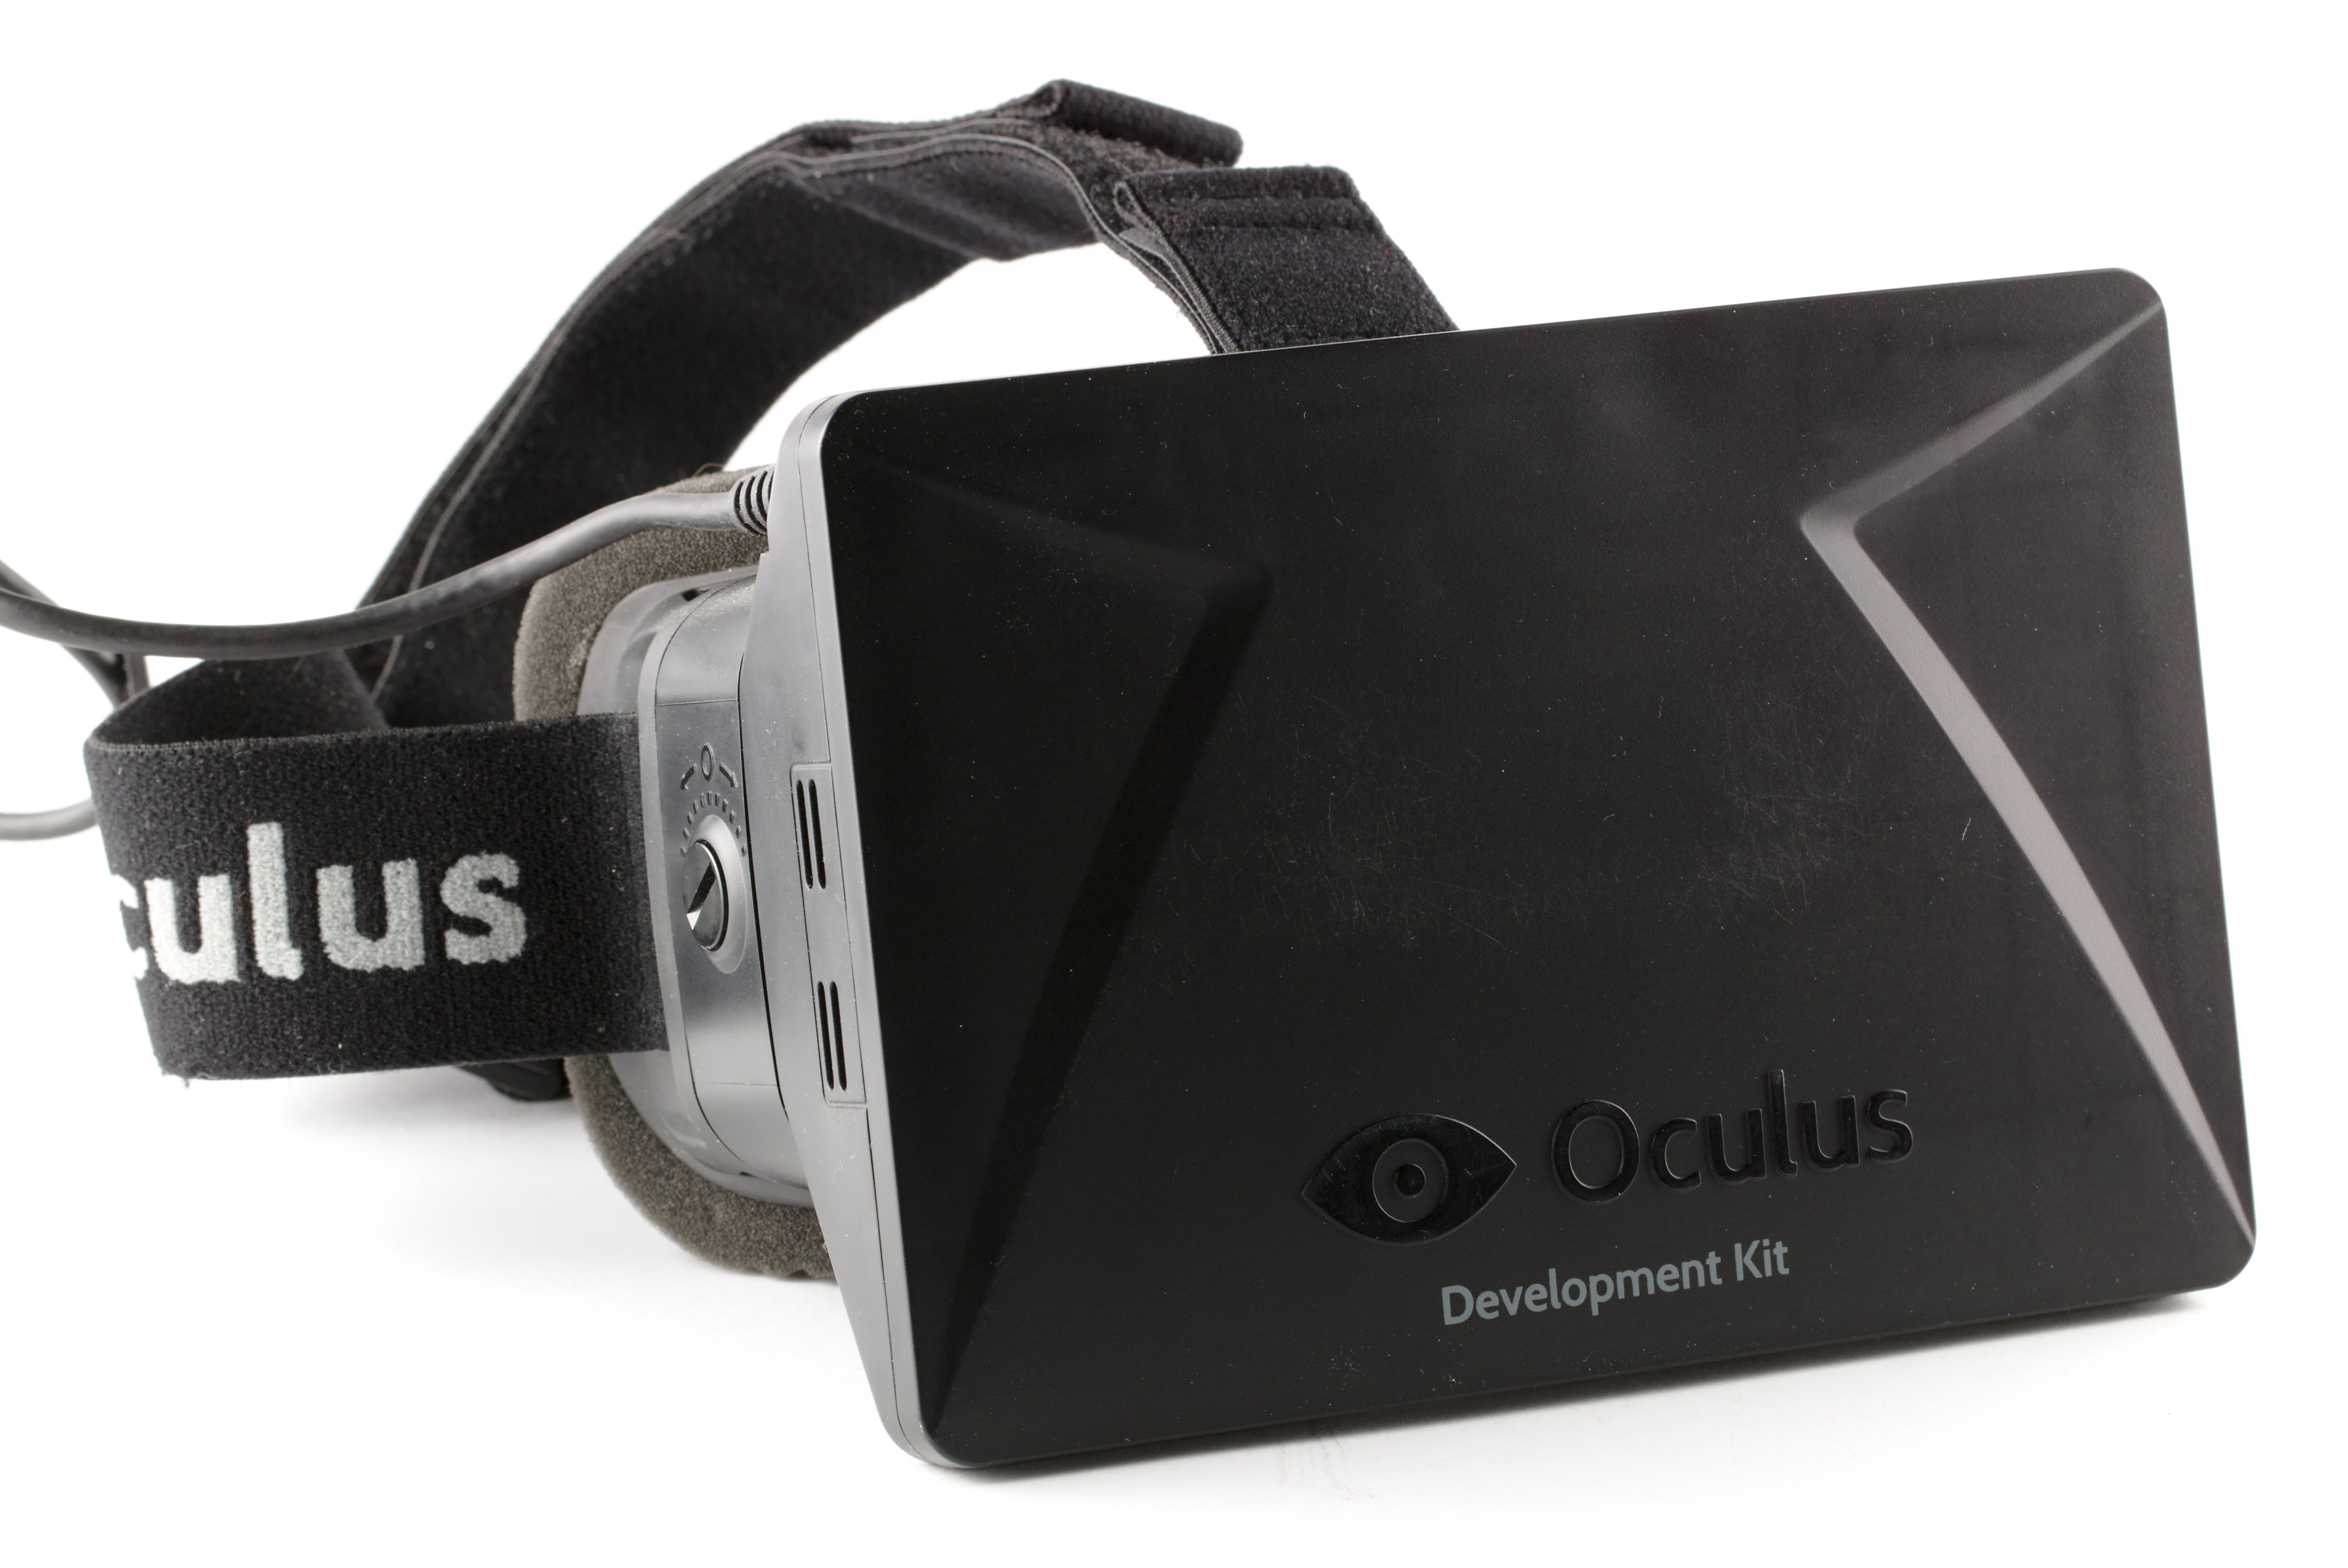
I received my Oculus Rift DK1 in early 2013, and I’ve been hooked on VR and its various forms ever since. In early 2016, I was one of the first employees to join a Seattle startup named Pixvana whose goal was to make it possible to create, edit, and playback immersive video. While we didn’t have official titles, I was something like a senior technical architect and someone who had his hands in almost everything we built.
I could write a lot about my time at Pixvana, but to stay on track, it’s important to know that we created a service that anyone could freely use to upload raw footage from an immersive camera rig, perform some basic edits (via a web interface and from within a VR headset), encode the output to multiple formats, and stream it to a custom player that ran on most of the VR platforms at the time.
We also built a product that enabled a “guide” to lead groups of people (e.g. students in a classroom, attendees of a film festival, potential home buyers on a property tour, etc.) through multiple waypoints in a shared immersive experience. Sadly, the VR market didn’t take off, and we had to pivot the company away from immersive video near the end of 2019. You can read more from friend and co-founder, Forest Key.
As our systems came online, we found ourselves working with many studios, streaming companies (you’d know all of them), filmmakers, enthusiasts, and individuals. Eventually, large corporations became interested, mostly in recreating real-life training scenarios that were too dangerous, too difficult, too expensive, or just easier to execute in a headset. Because nobody knew how to create compelling immersive video (including ourselves), we started a production arm staffed with Hollywood filmmakers and video professionals. We worked closely with hundreds of companies and users over the years to produce content across many categories.
Guidelines and Tips
Along the way, we learned many lessons, mostly through experimentation. I learned a lot about filmmaking and video techniques from my colleagues, and I was intimately involved in solving an endless number of technical problems related to working with immersive video. Because the output of our system was easy to share, and because we were frequently asked for feedback, most of us ended up watching thousands of videos (of varying quality) across many thousands of viewers. We also powered a few of the early VR film festivals.
In more recent talks with many of you (one of my favorite things to do), I inevitably mention a tip or three during the conversation that comes across as non-obvious and useful. And I guess that makes sense, since immersive video is still a nascent industry. So, I decided to sit down and capture some of my best tips. Keep in mind that I’m a software technician first…not a filmmaker.
Please take these tips as guidelines, not hard-and-fast rules. These are just starting points. This medium is still emerging, we’re all still learning, and it’s way too early to lock down anything I’ve written here. The only way to discover new techniques is to try them, and if I had only one piece of advice, it’d be to try your idea, then view it in an actual headset before you commit to doing it For Real. Immersive video is an art form, and there are no rules. Go crazy!
Immersive Video
Immersive video is video that provides a strong sense of presence, as if you are in a real environment. It is the art of convincing you that you are someplace else. Almost like you’ve been teleported. This isn’t a “window” to another place like you see with flat or spatial media where you’re confined to a rectangular frame. This video is wrapped around you in a hemisphere or a full sphere. Experiencing good immersive video is like you’ve been to a place rather than just having seen it.
I was visiting Muir Woods National Monument north of San Francisco with family a few years back, and as we rounded a corner in the park, I had the strongest sense of déjà vu. I put it aside, and then about ten minutes later, I had the same strong sense as we approached a small bridge. I was sure I’d been in that very spot! But I had never visited this park before.
Only then did it occur that, unbeknownst to me, I had watched immersive footage of this very park — perhaps hundreds of times — as unlabeled test footage that was provided by one of our filmmakers who lived in the San Francisco area. Indeed, I had been there many times…a memory of being in a real place because I had already been there virtually. Wild!
What Is Real?
Each of us has two eyes. If we measure the distance between the centers of each pupil, that’s called our inter-pupillary distance (commonly shortened to IPD). It’s because we perceive the world from two similar but different perspectives (binocular vision) that gives us stereopsis, the ability to see in three dimensions and to perceive depth. While there are other visual cues that help us understand depth (e.g. light, shadow, relative object sizes, etc.), stereo vision is by far the largest contributor.
We all live inside an amazing real-time 3D rendering system. Light is emitted from a source, like the sun, a streetlight, a lamp, or a computer screen. Those rays of light bounce off surfaces that can absorb and reflect different wavelengths (colors) and even scatter the light. Eventually, some of those rays pass through the lenses of our eyes and land on our retinas. From there, signals are sent to our brain for processing in the visual cortex. This is how we perceive our visual world.
Let’s do a thought experiment: what if we could somehow capture the brightness and hue of all those light rays over some duration, store them for later, then reproject them at the same brightness and color back onto our retinas? If we could do that with 100% accuracy, we shouldn’t be able to tell the difference between the real and reprojected scenes. If we want to convince someone that they’re fully immersed in an environment — as-if it’s real — this is our goal.
As you’re working with immersive video, keep this thought experiment in the back of your mind; it can answer many questions for you. For example, where should you place the camera? I would ask, where would a viewer’s eyes be located if they were present in the real scene? If you put them in an impossible position, it would be like snapping your fingers in the real world and suddenly seeing things from that impossible position. Your viewer’s sense of immersion and presence would be immediately broken, and they’d be reminded that what they’re seeing isn’t real.
Reality and Imagination
When we talk about making something feel “real” in immersive video, we’re not just stuck with the mundane or the everyday. Reality, in this context, is more about believability within the world you’re presenting. It’s about creating an environment where the viewer’s brain says, “Yes, I accept this.”
Think about it: we’ve all watched movies or read books where fantastical elements like dragons, spaceships, or magical realms feel entirely plausible within that story’s universe. In immersive media, the same principle applies. You can introduce elements that don’t exist in our everyday lives, but if they’re integrated seamlessly and adhere to the internal logic of the environment, they can feel just as real as a walk through a familiar park.
For instance, imagine standing on the deck of a starship, gazing out into a nebula that swirls with colors we’ve never seen before. You’ve never been there — no one has — but if the visuals, the sounds, and the physics of that scene are coherent, your mind accepts it. It becomes a real experience within that virtual context.
In immersive video, “real” is more about the authenticity of the experience rather than its adherence to our physical world’s limitations. It’s about crafting an environment — whether it’s an exotic alien marketplace or a serene underwater city — that feels tangible and coherent. This allows us to explore worlds beyond our own while still maintaining that crucial sense of presence and immersion.
180º Limitations
When you use a two-lens 180º camera system to capture a scene, there are some limitations that are worth understanding. Imagine that the camera lenses are your two human eyes. Except that they’re mounted on a tripod, they’re level, and they’re pointing straight ahead at a scene. As we learned earlier, if we can accurately capture these two separate views, record them, and later deliver them to your left and right eyes, we can try to convince you that you’re there.
But there’s a problem. On the day we record, those lenses are always pointing straight ahead…like having your eyes locked into position and looking forward. The good news is that everything should look correct if you hold your head still and look straight ahead when you later watch the recording, because this is how the world was rendered for you when the camera captured it that day. So, it matches what your eyes would have seen.
During playback, the immersive video we recorded is played back on a hemispherical (half-sphere) virtual screen that has a 180º horizontal and 180º vertical field-of-view. Viewers can freely move their head and direct their eyes to look at what was recorded, including elements that are close to the edges.
But wait…something is different. When a viewer turns their head to look to the left or right, their eyes no longer match the orientations of the camera lenses that were used during recording. Those camera lenses were fixed and looking straight ahead the whole time. When a viewer turns their head, though, their eyes sweep through an arc with their neck as the point of rotation (turn your head right and left and note the position of your eyes). The viewer’s visual system is no longer in perfect sync with what we captured.
So, what does this mean for our perception of depth? As we’ve learned, depth perception arises from the slight difference between the images seen by our left and right eyes — a concept known as binocular disparity. To visualize this, imagine that our camera lenses are emitting bright lasers straight ahead from their centers. These lasers are level, parallel, and spaced apart similarly to our eyes.
However, when it comes to capturing elements at the far left and right edges of the scene, these straight-ahead lenses are still the ones doing the capturing. The lenses don’t turn to face the sides; they remain pointed forward.
Now, picture those lasers coming from the center of each lens (or eye) and aiming toward objects on the sides. You’ll notice that the lasers from both lenses almost overlap, meaning there’s very little separation between the left and right viewpoints for those side objects.
Try this simple experiment: Keep your head facing forward and move your eyes as far to the right or left as you can. If lasers were shooting out of your eyes, they’d nearly converge, with almost no horizontal separation. This minimal difference means there’s little to no binocular disparity.
When you later view this footage and turn your head to look in that direction, the playback can only show what was originally captured by the forward-facing lenses. Because there’s minimal horizontal disparity in the images near the edges, those areas won’t appear in 3D — they’ll look flat. This is why the depth effect diminishes near the left and right edges in two-lens, 180º video captures.
Here are some animated images that illustrate this kind of issue.
So what did we learn in that technical discussion? Well, that as objects are horizontally further from straight ahead, they lose their 3D-ness. Most viewers won’t notice this at all, but now that I’ve told you about it, you can easily verify that it’s true. The easiest way to do this is to close one eye, look at an object near the edges of an immersive 180º stereoscopic video, then open that eye and close the other one. If the object doesn’t “move” horizontally, that object won’t be seen as having any depth. Of course, if the object itself is far away (e.g. distant mountains), it’s probably too far to discern much depth anyway.
Finger Experiment
This is a perfect time to perform another experiment. Hold your index finger straight up about a foot in front of your nose. Now focus on something farther away…perhaps across the room (to simulate two parallel camera lenses). Without re-focusing on your finger, notice that you now have two index fingers! Alternate closing each eye, back and forth. Again, without focusing on your finger, you should see your finger jump left and right. This apparent difference in position between your two eyes is called parallax.
It’s worth building an intuition about the relationship between things that are closer relative to things that are farther away. Still focusing at distance, close your left eye and note the position of your finger. Then, open your left eye and close your right. From your left eye’s perspective, you see more area to the left of your finger, which makes your finger appear to be farther to the right. Likewise, from your right eye’s perspective, you see more stuff to the right of your finger, making it appear farther to the left.
If you remember this (or remember to repeat this simple experiment), you can look at the left or right image in a pair of stereoscopic images and quickly determine which belongs to each eye. Believe me, they can get crossed and confused during the editing process, especially if you’re bad at naming your files! Final_final_for_real_3.jpg!
Okay…hopefully, I’ve driven home the point that our camera system captures two perspectives of the world, each separated horizontally by some distance (technically called the camera baseline). That capture can be played back later, and if a viewer looks straight ahead when it’s reprojected on a hemispherical screen, everything should look correct. And we learned that when a viewer rotates their head to look left or right, the depth effect diminishes, because the camera lenses were recording straight ahead.
Leveling
Now, what happens if — while viewing the playback — instead of panning your head horizontally left and right, you tilt your head to the left or right? Kind of like you’re going to peek around or under something in the scene. Think about it for a minute. The camera only captured images when looking straight ahead and level. Now, though, you’re watching that capture with your own eyes in not just horizontally different positions, but also in vertically different positions. That does not compute! For the image to look correct, the camera lenses would have also needed to be in those same positions…but they weren’t. Try tilting your head the next time you watch an immersive stereoscopic video, and you’ll see what I mean.
So, what’s the takeaway here? Well, if users are normally going to turn their heads horizontally left and right…while remaining basically level, we should take extra care to make sure that our camera lenses are horizontally level and aligned to ensure that our image pairs are captured correctly and therefore more comfortable to watch.
Shutter Sync and Disparity
An extension to this idea is that it’s necessary to have two camera lenses with synchronized shutters, meaning that they both capture an image at exactly the same time. Otherwise, an object in the scene may be in a slightly different position in one eye than in the other, and as we’ve learned, that can affect our perception of depth if it’s horizontal, and if it’s vertical, it’ll just look uncomfortable. This is mostly a problem with custom camera rigs that use two independent cameras where it’s almost impossible to synchronize the shutters (though there are some creative and determined photographers out there).
Another thing to consider is that any given camera baseline is going to be different than almost everyone’s unique inter-pupillary distance (IPD). So, we typically try to target an average human IPD of around 65mm to accommodate as many viewers as possible. Fortunately, slight differences here don’t have a huge impact, and if the headset and immersive video player both know the unique user’s IPD, they can artificially tweak the horizontal disparity of the two frames during playback. This can also be done to creatively influence depth perception.
Maybe you’re wondering why you don’t notice the effects I’ve described when looking at the UI of other apps or games in your headset. That’s because the headset knows exactly where your eyes are located, how your head is oriented, and can synthetically create the correct left- and right-eye views as you look around. It’s not a recording…it’s being generated just for you on-the-fly.
You’ve probably seen some impressive Gaussian splat images that foreshadow techniques that we can one day expect with video. I’ve seen early technical demos, and each iteration gets better and better. When this technology becomes good enough, the limitations I’m describing here will either diminish or completely disappear.
Visual Fidelity
Let’s get back to what makes your visual reality seem real with another thought experiment. Imagine wearing a normal pair of glasses (not a headset…just your average pair of corrective lenses) and smearing Vaseline over the lenses. Would it suddenly seem like your world is no longer real? Or would it just look like a blurrier version of reality? I contend that the world would feel just as real and convincing, even though it is no longer sharp.
This explains why you can achieve a very convincing sense of presence even in a lower resolution headset. Don’t get me wrong…I love more pixels and greater visual acuity! For the very same reason that corrective lenses exist, we like to see things as clearly as possible. Additionally, the higher the resolution, the more we can discern the depth of objects that are farther away in a scene.
Frame Rate
Have you ever wondered about the frame rate of your reality? When a photon hits a photoreceptor in your eye, a chemical reaction generates an electrical signal that travels to your brain via the optic nerve. But, unlike a camera shutter where exposures happen at discrete intervals, this process is continuous. So, you don’t really have a built-in human frame rate.
Perhaps the better question for immersive video is: what is the minimum acceptable frame rate where motion in the scene appears to be continuous? As with many things, this depends on the person doing the viewing, the device that’s being used, the display characteristics, and the type of motion in the scene.
Here’s another thought experiment: imagine looking straight ahead while someone throws a baseball across (perpendicular to) your line-of-sight. We won’t perceive the ball as moving in discrete steps as if recorded by a set of frames. Instead, we would describe it as smooth, continuous motion. So, to achieve a strong sense of immersion and presence, we should strive to deliver as many frames per second as we reasonably can, especially in scenes that contain fast lateral movement.
This is one of those times where traditional “flat” filmmaking techniques can come into conflict with immersive techniques. We’ve all been trained to see 24 frame-per-second movies as “cinematic,” and when we watch higher-frame-rate video, it starts to look almost too real. Uncanny. You may have heard this called the soap opera effect. Some feature films have been released at high frame rates (HFR) often to mixed reviews.
For immersive video, higher frame rates are better, because we don’t perceive a discrete frame rate in the real world. Based on personal experience, it’s much easier to show a director this effect than to convince them with words alone. It’s interesting to note that the HLS streaming ladder for Apple’s immersive video maintains a 90fps presentation (while reducing resolution) across all renditions, likely for this very reason.
So, what is the recommendation? I personally consider 60fps to be the minimum acceptable frame rate for immersive media on modern headsets. On Apple Vision Pro, 90fps is a sweet spot. While filming, care should be taken to limit anything that could cross the camera at high speed. For example, instead of filming a baseball pitch from the side, consider shooting more parallel to the pitch itself. For racing, shoot along the track, not perpendicular to it. Etc.
Noise
Another “tell” that we’re not in the real world is the presence of noise that shows up as random variations of color and brightness in a captured frame. All cameras produce some sensor noise, often dependent on how much light is available in a scene. In flat productions, noise is even added synthetically to reduce banding or for creative effect. With immersive video, though, noise is a reality killer, and it’s something to be aware of when capturing footage. Better lenses, cameras, sensors, and lighting go a long way to reducing or eliminating this issue.
For noise reduction, I’m personally a big fan and user of both Neat Video and Topaz Video AI, though I’m sure there are others that do a good job. Another benefit of noise-reduced video is that it is much more efficient to compress, resulting in higher quality at reduced bitrates.
High Dynamic Range
The world has a much wider color gamut than we can currently reproduce inside of a consumer headset. Because of this, you should strive to capture as much of that color as possible, even if you later export to a lower 10- or 8-bit depth. That said, I’ve seen excellent immersive video in SDR (Standard Dynamic Range), so don’t worry too much if you can’t yet capture more than 8-bit color.
On the topic of color, you can probably guess what I’m going to say next. The real world doesn’t (usually) look like a vibrant, over-saturated painting. While it’s common to color grade a film for creative effect, a more natural look is a better starting point for immersive video. As I said at the outset, though, this is an evolving medium, and I’ve also seen great presentations with punched-up color for more of a hyper-real sense.
Flares and Highlights
Another flat filmmaking technique that adds style to a shot is the creative use of lens flares and other lighting effects. Our eyes don’t perceive these effects in real life, though, and the presence of these elements can disrupt the feeling of presence and immersion. It’s another “tell” for your brain.
With a two-lens camera system, you can also end up with a lens flare or specular highlight in one of the lenses but not in the other. This means that one eye will see a visual effect but the other won’t. This conflict is uncomfortable for viewers, and it’s especially challenging to control when there are a lot of reflective surfaces in view of the camera. Not to mention the use of 180º fisheye lenses without lens hoods.
Camera Movement
If there’s one guideline that nobody wants to follow, it’s this one. In flat productions, a director is almost always moving the camera to help tell a story. And one of the first things many people (think they want) to experience in a headset or immersive video is a roller coaster ride, and nearly every director wants to strap a camera to an actor’s head, the front of a car, or some other fast-moving object.
I’m here to tell you that — no matter how convincing you think you are — it’s best to let them try it for themselves (or try it yourself if you haven’t already). Some will say, “it’s not that bad,” or that “people will get used to it.” While it might not be that bad for some set of people, and indeed, some frequent users might get a little more used to it, the simple fact is that many people start to feel nauseous when their eyes are moving through a scene under someone else’s control.
I’ve helped hundreds — if not over a thousand — people experience hundreds of immersive videos over the years, and it’s a fact that a significant portion of viewers will not like an immersive video that includes motion. How much motion, you ask? Well, even a camera on a tripod located on a stage (say, next to a musician) can be too much for some people, because the camera vibrates when someone walks across the stage. Or gusty wind at a beach causes the camera to ever-so-slightly wobble on its tripod. Or a filmmaker who thinks they can handhold a camera really still. And yes, even that filmmaker who thinks that they can handhold a camera the stillest! Sorry.
As with many of these tips, though, it’s best to shoot some test footage and view it back on-set and in-headset. A flat monitor doesn’t count, because often, the pixel movements are too small to see. But when you have two large magnifying lenses in front of your eyes, these otherwise imperceptible movements can become nausea-inducing shakes.
The Vestibular System
I can feel the sadness setting in: you mean, I can’t move the camera at all? Well, here are some tips to reduce the unsettling effects of motion if you absolutely must. Just keep in mind that the viewer isn’t choosing to make these movements, and that’s not how the real world works.
When you experience motion, the vestibular system in your inner ear is responsible for detecting position, movement, and balance. When the camera moves in an immersive video, we’re telling a viewer’s visual system that movement is happening, but no accompanying inputs are being provided to the vestibular system. This disconnect between two of our primary sensory systems is what leads to feelings of motion sickness, including nausea and discomfort. This uncomfortable feeling is sometimes called cybersickness (more here).
Over the years, a few techniques have been shown to reduce these unwanted effects.
First, imagine accelerating or braking in a car. You only feel the acceleration while you’re speeding up or slowing down. If you turn the car left or right, you feel lateral movement. But, once you’re up-to-speed and traveling along a straight stretch of road, you no longer experience these sensations. So, the first recommendation is: if you must move the camera, move in a linear fashion at a constant velocity…don’t speed up or slow down. This way, we give a viewer’s vestibular system what it expects, which is no sensation of acceleration or deceleration at all.
Second, it seems that being surrounded by a frame of reference that moves with you can alleviate some of these motion effects. This technique is frequently used in VR games. This could be seeing the interior of a car as you move down the road or including the body of a helicopter as you watch the world passing by below. If you’re planning to do this, please test it first.
Third, a VR game called Eagle Flight (where you assume a first-person perspective of an eagle as you swoop through the city), manages to reduce the effects of an insane amount of motion by blurring the edges of the frame in proportion to the severity of each turn. This has the effect of obscuring the speed of objects moving along your visual periphery. I was skeptical that any of these techniques would work the first time I tried this game, but after only a few moments, it was clear that it worked…at least for me. Your mileage may vary.
After all of that, the best advice I can give is to lock-off the camera on a stable tripod with a firm base and allow the user to look around themselves.
Scene and Perspective Changes
A common technique for comfortable movement in VR games is to allow the user to teleport. No motion is necessary, and even though we don’t experience teleportation in real life, it somehow doesn’t feel out-of-place in immersive situations (see…not everything needs to be 100% real). These transitions can be hard cuts or dips to black. Cross-fades, however, might feel awkward, because the blended scenes can be confusing where competing depth cues stymie our perception.
In the early days, we reasoned that if we teleported a viewer, they’d need to be facing the same direction after the teleportation. The problem, of course, is that they often would no longer be facing the subject of the scene. Imagine watching a theater performance from the front row, then teleporting behind the performers. If we retain the viewer’s orientation, they’d now be looking at the back of the stage with the performance behind them. Definitely not ideal.
Through experimentation, we quickly learned that users would accept an instant orientation change in these situations. This means that the camera located behind the stage can be facing the performance, even though this represents a 180º change in perspective for the viewer.
The idea that the primary subject in one scene closely aligns with the position of the primary subject in the following scene is another key learning that makes it easier for viewers to follow the action in immersive video. That is, if a viewer is looking to the right side at the end of one scene, it’s very handy and comfortable to place the subject of the next scene near that same spot. This is easier to do with 360º footage, because you can simply rotate the entire view horizontally to align the subjects (and optionally crop to 180º). For 180º camera setups, this requires advanced planning.
Before we leave the topic of scenes, I’d also recommend slowing down the pace of scene changes in immersive media. A 180º encompassing view — like being teleported into a new place — takes viewers more time to acclimate to and survey than a rectangular, flat, 2D view that can be perceived in its entirety. If you closed your eyes, opened them, and discovered yourself in a completely new location, you’d need an extra moment or two to get your bearings. Also because of this, it can be useful to wait a beat or two before starting the action of the scene.
Sensitive Viewers
Everyone is unique, and each viewer has their own triggers, phobias, sensitivities, and tolerance levels. Because immersive videos place viewers in unique situations, you don’t always know how they’re going to react. Unlike flat media, though, a user who is fully immersed and present in the scene ideally “forgets” that they’re wearing a headset. From their perspective, they’ve teleported to a whole new place…they’re not just viewing a scene through a flat rectangular window. This is a creative advantage for immersive media, but it also has its risks.
At Pixvana, we gave VR demos to almost everyone who visited the office. Modern consumer VR was brand new at the time, and nobody had their own headset. One day, we were giving a demo that included the excellent TheBlu experience, where a whale slowly swims right past you, providing an impressive sense of scale. This demo almost always elicited oohs, aahs, smiles, and childlike wonder. So, imagine our surprise when a visitor shrieked, grabbed the (expensive) headset, threw it off their head, and stood there with a look of abject terror on their face!
After taking a moment to calm down, our visitor explained their fear of being underwater and how the immediate sense of being submerged was terrifying to them. Lesson learned! Since then, I tell new viewers 1) in general, what they’re going to see, and 2) that they can simply close their eyes if something is uncomfortable. Even with those warnings, when a user is truly immersed, they often don’t think to close their eyes.
Another situation that is disconcerting for many viewers is the lack of a “foundation” that their immersive body would be standing or sitting on. At Pixvana, we captured footage of a Seattle stadium, and in one of the shots, the camera was positioned near the edge of some high seating. When viewers transitioned to this scene, many were alarmed at the lack of a hard surface to stand on. After all, it’s not every day that you find yourself suddenly floating in open air with a sports field far below.
The takeaway from this section is to remember that teleporting someone to a place that seems real might not be as exciting or interesting to everyone. Act accordingly.
Stereo Window Violations
You may have noticed that almost all 180º immersive media has a soft Gaussian blur around the periphery of the hemispherical screen. Sometimes this is there to hide the neighboring camera’s fisheye lens bump. Often, though, it is to prevent or alleviate so-called stereo window violations.
Imagine a traditional 3D movie that is presented in a rectangular frame. For elements that are “inside” or behind that frame, it looks like we’re viewing the scene through a rectangular window…just like a window in real life. However, for elements that appear to “pop out” in front of that frame, we need to pay special attention to the frame’s edge.
If the element that pops out is entirely contained within the frame for both the left and right eyes, it appears as expected. If, though, the element is chopped off by a frame’s edge, our brain is unable to correctly fuse the left- and right-eye images to make sense of what we’re seeing. After all, why would a window frame “chop off” elements that are poking through the frame? It wouldn’t.
The advice here is to be aware of this potential issue when capturing footage and to use techniques like edge blurring to reduce the stereoscopic effects of elements that are closer to the viewer.
Directing Attention
It’s understandable that first-time immersive filmmakers naturally bring their 2D techniques with them. After all, isn’t immersive video just one extra “D” projected on a bigger screen?
You’ve already read how camera movement has different considerations for immersive video, even if you’re not completely convinced. Turns out, the viewer is their own director in an immersive scene, and they control their focus and attention by moving their head and eyes. The techniques that you traditionally use for flat media to direct focus and attention don’t work as well (or maybe not at all) in immersive media.
A common technique used in flat media is the close-up, where the camera zooms-in on a subject to focus the viewer’s attention. I don’t know about you, but I don’t experience instantaneous close-ups in real life! In fact, when used in immersive video, I find them too personal and a bit uncomfortable, and they just don’t look right. As a viewer, I am effectively forced to accept an awkward perspective with no opportunity to reposition or back up. For me, it absolutely breaks my sense of immersion and presence in a scene.
Another technique from flat media — also used with close-ups — is a shallow depth-of-field, where the background is purposely out of focus and blurry to draw attention to a foreground subject. In the real world, everything we see appears to be in focus all the time. This is another technique that doesn’t jibe with reality and can immediately break that sense of presence.
Instead of flat filmmaking techniques, it can be advantageous to learn how theatre directors use stagecraft to direct attention. Perhaps an actor stepping forward. Or a slight lighting change. In many ways, viewing a scene from a single position for a longer duration of time across a wider field-of-view is much more like watching a stage performance than watching a film.
Spatial audio plays an important role here and could warrant its own article. While the human visual system has an average ~130º horizontal field-of-view, our ears can perceive a full 360º regardless of where we’re looking. We can hone-in on audio cues instantaneously and with great precision, even when the lights are off. Because of this, audio cues are a great technique to draw a viewer’s attention to a specific area in an immersive view.
Time Perception and Fatigue
If you’ve spent any time in VR, you’re probably familiar with the feeling that you were only in the headset for 30 minutes, but according to the wall clock, 45 minutes have passed. While this time dilation effect has been studied, we’re still not sure of its cause. Regardless, time seems to pass more slowly when you’re fully immersed. Be aware of this effect as you edit your content and consider its duration. Shorter may be better.
Did you know that when you put on a headset, your eyes focus on the displays at a fixed distance? This focusing of the lens is called accommodation. Most headsets have a focusing distance around 1.5 – 2.0 meters. Vergence is the term used to describe your two eyes converging on a subject so that it appears as a single object. In the real world, your eyes accommodate and converge on a subject as part of your accommodation-convergence reflex. However, in a headset, your eyes are always focused on the displays, while your eyes converge to fuse two images. This disconnect is referred to the vergence-accommodation conflict (VAC), and it can cause fatigue.
Because of these factors, it’s important to be sensitive to the duration of your immersive media and test-drive your content with multiple viewers. In my experience, shorter media (10-20 minutes) is generally preferable to viewers than longer media (1-2 hours), even though many viewers proclaim to want feature-film-length content. If you intend to deliver longer form content, I’d consider breaking it up into shorter, more palatable episodes. The Soloist VR — in addition to being a great production — is a fantastic example.
Compression and Bandwidth
There’s no getting around the fact that high-quality immersive media files are massive. Not only can they have high pixel dimensions like 8K x 8K per eye, but they often include 10-bit-per-pixel color at up to 90 frames-per-second. If you’re doing the math, that’s ~362 gigabits of uncompressed video bandwidth every second!
Efficiently compressing such a large frame while retaining visual fidelity can be a challenge. The real world doesn’t have compression artifacts, and when someone views your content behind two large magnifying lenses, small issues are…err…magnified! Video that looks good on your flat monitor may not look nearly as good in-headset.
Fortunately, as we’ve discussed, immersive video is often captured with a locked-off camera, and with less movement, scenes are easier to compress. Another advantage is that noise-reduced video is also easier to compress. Good immersive video by its very nature tends to achieve more efficient compression because of these factors.
In-Headset Preview
As mentioned earlier, while a flat monitor is useful for editing, it is no replacement for evaluating your edits in a headset. Headset displays have different color characteristics and pixel persistence, and the sharpness of objects in the scene cannot be properly evaluated without being immersed yourself. Also, because flat edits are typically performed on projected/distorted video (e.g. equirectangular, fisheye, etc.), it’s very difficult to assess how those edits will look until they’re re-projected.
As an aside, I really miss the in-headset immersive video editor we built at Pixvana. Once you’ve had the experience of editing from within a scene, it’s hard to want to use anything else. Editing immersive video on a flat monitor is like trying to decorate a room in your house by sliding furniture cutouts on a photo, then occasionally walking into that room to see how things look. Unfortunately, I’m not aware of an in-headset editor that isn’t just a flat app projected in a 2D window (which is worthwhile, mind you), and the Pixvana editor is no more. Perhaps someday!
Correct depth is critical to a comfortable stereoscopic viewing experience, and it’s important to assess the distance of text and graphic overlays as they relate to the rest of the scene. Titles, subtitles, captions, and other elements should generally appear “in front” of other objects, and this is difficult to assess without previewing inside of a headset. Editing tools that support an anaglyph viewing mode can provide a quick-and-dirty compromise.
Likewise, because a viewer’s eyes must converge or diverge to resolve objects at different distances, it can be fatiguing to constantly look back-and-forth between subtitles that are too close and subjects that are farther away. This is another aspect that is best evaluated in-headset.
Immersive-Aware Effects
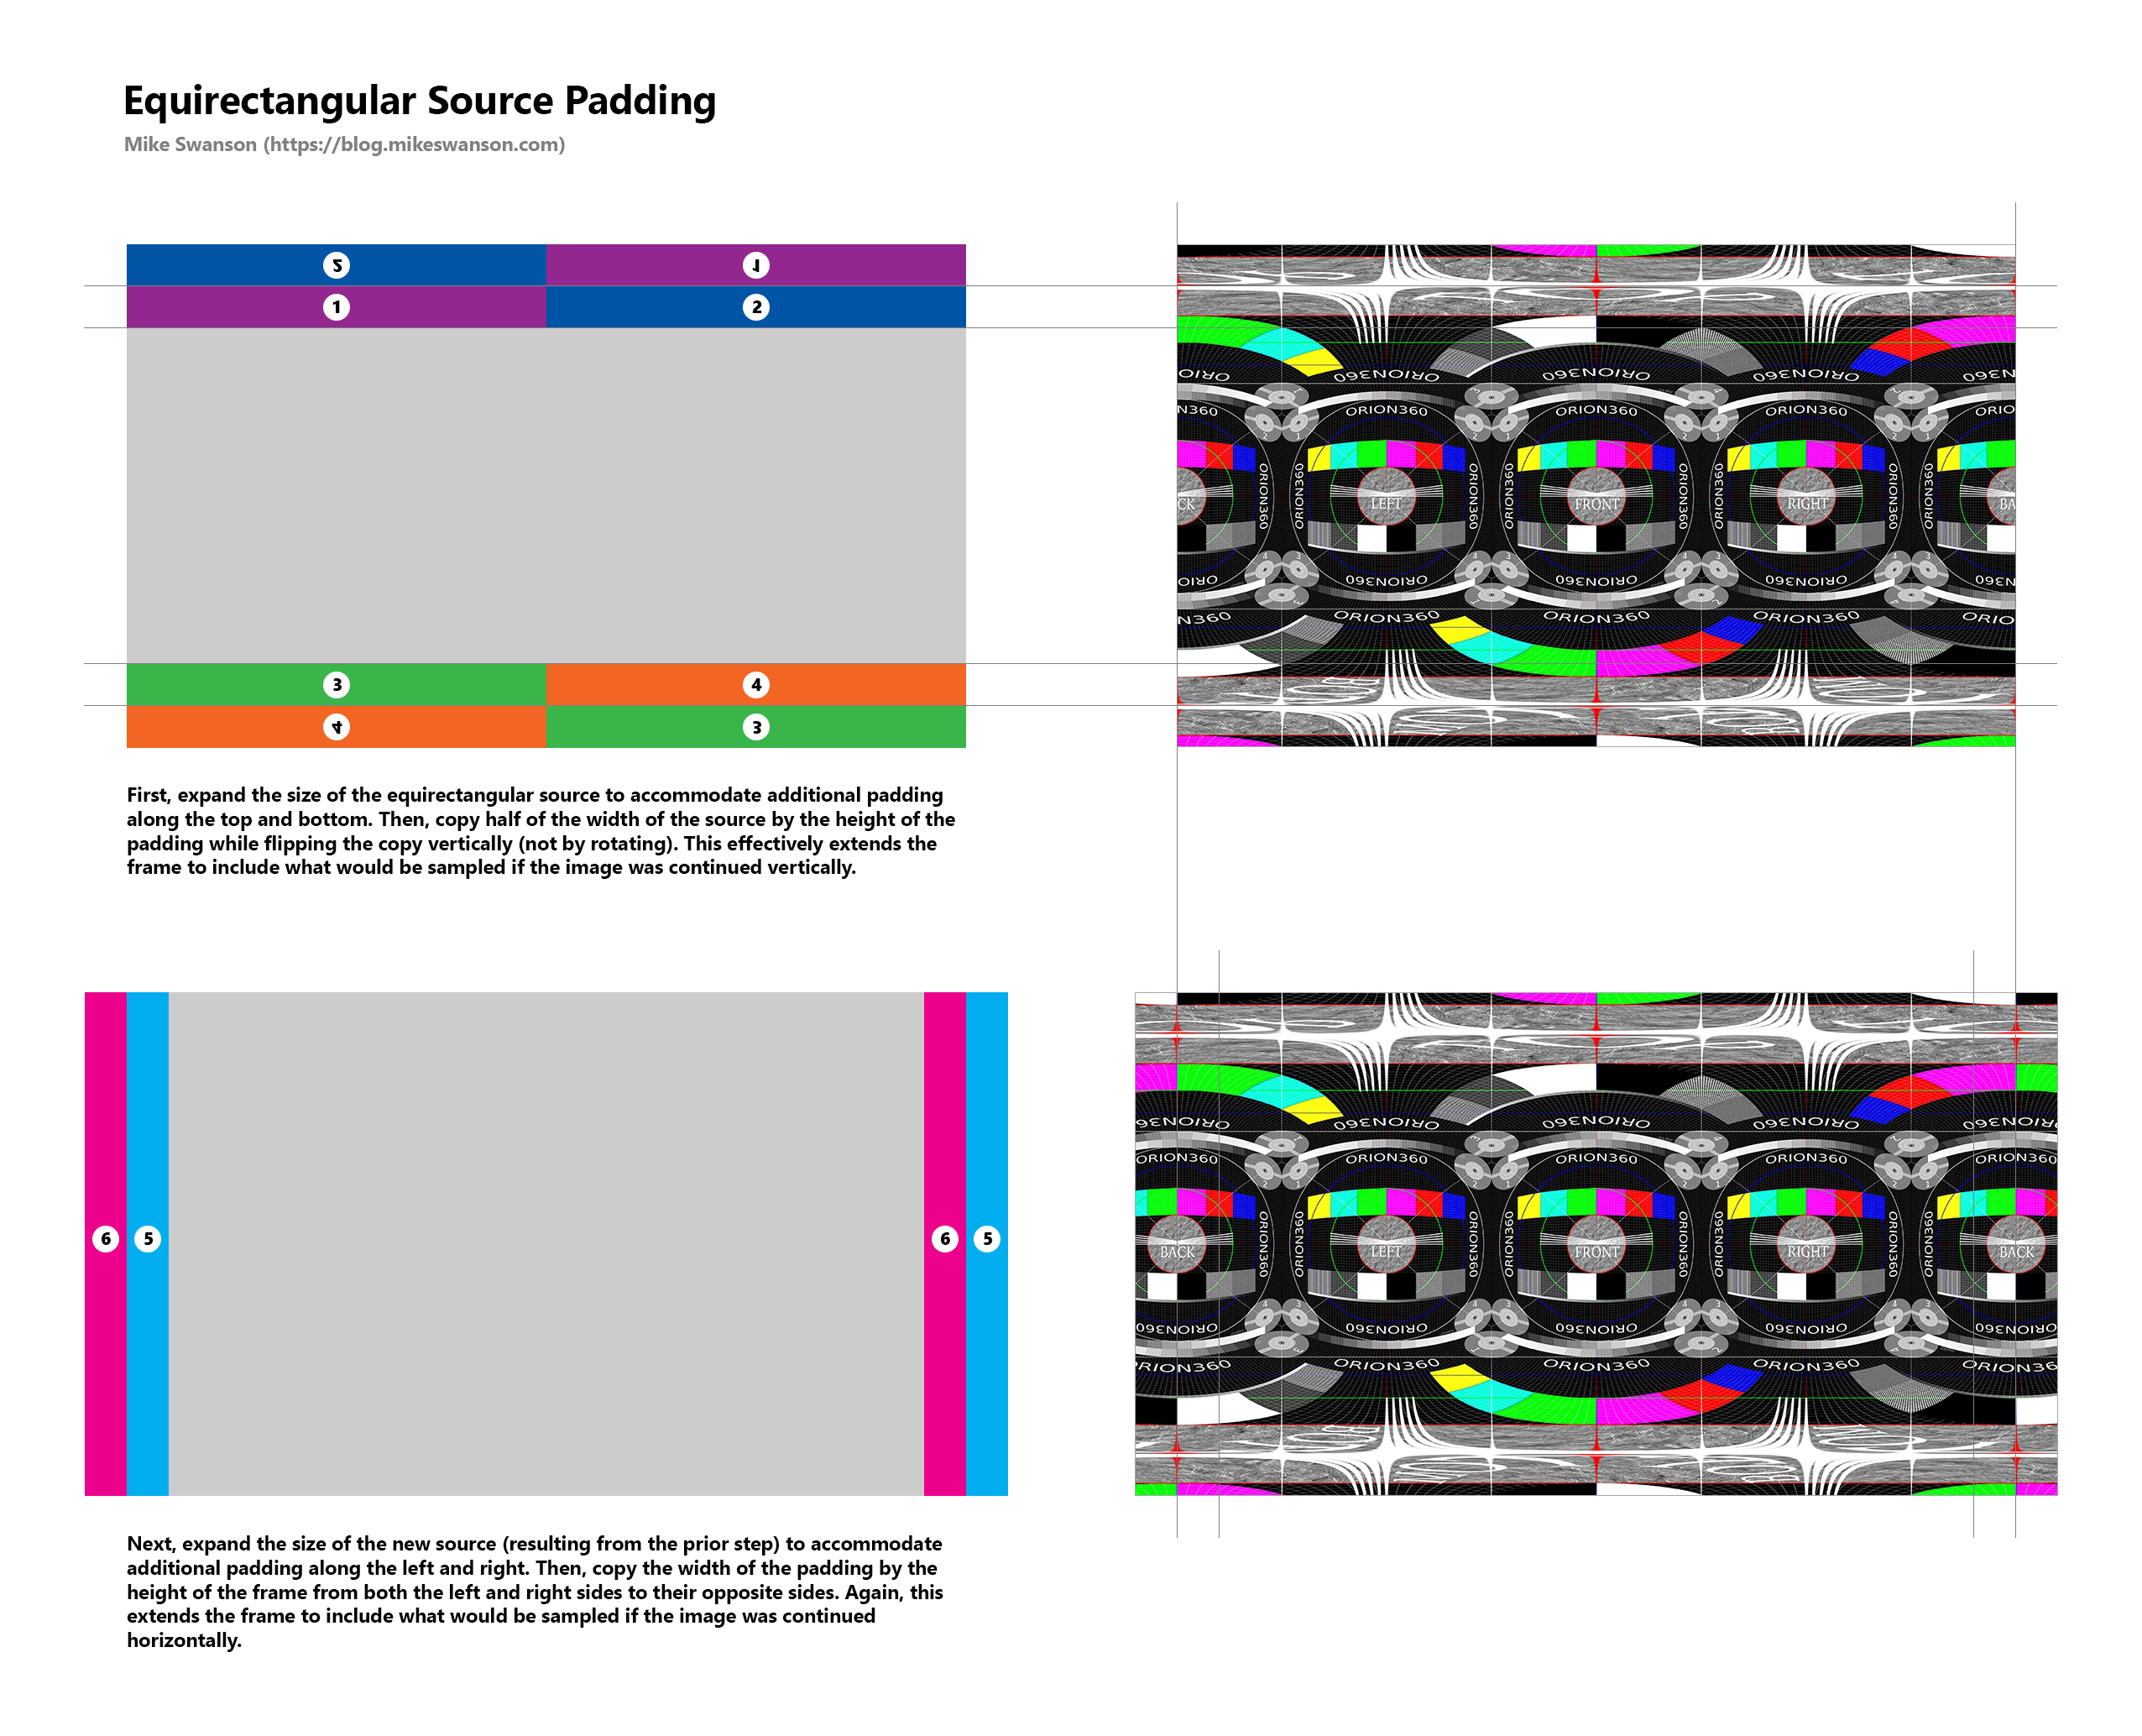
For immersive video that covers more than 180 horizontal degrees and a full 180 vertical degrees, image filters need to be aware of how spherical pixels are projected onto a raw video frame. This is because image filters and effects frequently work with a region of pixels that surround a source pixel (an image kernel), and pixels at the edge of an immersive frame need to “wrap around” to another area of the same frame.
Traditional 2D effects and filters often have multiple methods of handling image kernels near the edge of an image, but they’re otherwise unaware of spatial wrapping. Running these filters on immersive media with a larger field of view can introduce visible “seams” as a result. They might not be visible on a flat monitor, but they become visible in-headset.
If you think about it, a 360ºx180º image always has a “next door” sample for each pixel; there are no edges. Put another way, look around you right now…there are pixels to be sampled everywhere!
If you want to apply a filter or use an effect that isn’t immersive-aware, here’s a trick that I used at Pixvana. It basically involves copying portions of a 360×180 frame such that the frame is padded with the would-be-wrapped-around pixels. Then, a traditional 2D filter can be used, because the pixel samples are where they’re expected to be. Finally, crop the frame to remove the extra padding.
Here’s a Windows FFmpeg batch script that illustrates the concept. As always, be careful about how many times your frames are being compressed/uncompressed to reduce any compression-related artifacts.
360º vs. 180º
In the early days of Pixvana (and the industry), we produced a lot of monoscopic (2D) 360º video. As stereo cameras emerged and stitching technology improved, we found ourselves working with more and more stereoscopic content. But, because stereo production required both left- and right-eye views to be packed next to each other in a single video frame, many viewers preferred higher-resolution, full-frame monoscopic playback over half-resolution (in one dimension) stereo playback. Plus, because of stitch lines, imperfect camera calibration, and more technical challenges, immersive 360º stereo was tough to get right.
For the curious, yes, we had a working version of view-adaptive streaming that we called FOVAS (Field-Of-View Adaptive Streaming). It was a fun technical challenge to pull off, but unfortunately, the realities of physics, reliable bandwidth, latency, and viewer preferences meant that most viewers preferred a (technically) lower quality — but more stable — presentation.
While Google didn’t invent the idea of 180º immersive video, they popularized it by sharing a VR180 specification and supporting the format on YouTube, where it’s still supported today (though I’ve heard that support can be finicky). It’s very likely that YouTube hosts more 180º immersive video than any other platform.
With the recent resurgence of 180º immersive video, I’ve heard comments about how difficult it is to shoot and light a scene, because “everything” is captured within the hemisphere. Well, I’m here to tell you that 180º is a dream compared to 360º capture. Where do you place lighting, crew, cables, and basically anything you don’t want to be captured when you’re filming everything around the camera? One of our Pixvana crew members had to crouch down and hide under the camera tripod during at least one of our shoots!
180º-ish stereo immersive video is absolutely my favorite format. And if I could get just a little bit more, perhaps 220º or so, that would be even better. 180º is much easier and less expensive to produce than 360º content for the reasons mentioned earlier. Plus, 180º video naturally focuses a viewer’s attention to the front half of a sphere, and the entire scene can be captured with a two-lens setup. Because you only need to transmit 180º of content, you can allocate more resolution to the final frame, resulting in a sharper overall image.
While 360º might sound ideal, we captured viewing statistics for some of our Pixvana media, and that data reflected another study showing that most viewers take a quick look around them for orientation. Otherwise, they spend most of their time following the subject which is typically towards the front. Also, when you’re lying in bed or seated on a plane, it’s very awkward and inconvenient to turn around and look behind you.
Wrap-Up
Thank you for reading this longer-than-expected post about many of the lessons I learned during my time at Pixvana. Keep in mind that I’m primarily a software technician, not a filmmaker. Most of what I’ve related here is due to small nicks and cuts, hard-won experience, and working side-by-side with people who discovered these techniques on their own.
Also remember that these are guidelines…mere starting points. They’re certainly not rules, and the medium is too new to limit experimentation. Just be sure to test-drive your ideas before you do them for real.
Finally, if you’re an immersive filmmaker with tips, tricks, and experience to share, please leave a comment so that others can benefit. Or drop me a line.
Thank you for your time, and I wish each of you the best of luck!
Resources
Note that many of these groups have “360” in the title, but for most of them, this is a legacy of the fact that the majority of early immersive video was 360º. These groups now discuss 180º and similar formats.
- The 360° Video Handbook Second Edition by Michael Wohl. The first edition of this book was developed during the Pixvana years (with input from friend and former colleague, Aaron Rhodes) and was the best/only book about immersive video production.
- FFmpeg v360 filter documentation. A free and great way to read and write to various projection formats.
- 360 Rumors site
- 360° VR Video Professionals on Facebook
- VR180 users and fans on Facebook (moderated by 360 Rumors)
- Apple Immersive Video on Reddit
- EOS VR SYSTEM Users on Facebook
- 360° VR Producers on Facebook
- 360 Cameras on Facebook
- Insta360 Community on Facebook
- Magical Images: A Handbook of Stereo Photography by Geoff Ogram. Focuses on photography but provides a good technical understanding of stereoscopic techniques.
Leave a Reply